Download Software
Download the following software.
Download the Oracle software from OTN or MOS depending on your support status.
- OTN: Oracle Database 11g Release 2 (11.2.0.1) Software (64-bit)
- MOS: Oracle Database 11g Release 2 (11.2.0.2 or 11.2.0.3) Software (64-bit)
UNZIP Files
# 11.2.0.1
unzip linux.x64_11gR2_database_1of2.zip
unzip linux.x64_11gR2_database_2of2.zip
#11.2.0.2
unzip p10098816_112020_Linux-x86-64_1of7.zip
unzip p10098816_112020_Linux-x86-64_2of7.zip
#11.2.0.3
unzip p10404530_112030_Linux-x86-64_1of7.zip
unzip p10404530_112030_Linux-x86-64_2of7.zip
Hosts File
The "/etc/hosts" file must contain a fully qualified name for the server
127.0.0.1 localhost.localadmin localhost
192.168.2.181 ol5-11gr2.localdomain ol5-11gr2
Oracle Installation Prerequisites:
We can manually perform the prerequisites task:
Oracle recommend the following minimum parameter settings
fs.aio-max-nr = 1048576
fs.file-max = 6815744
kernel.shmall = 2097152
kernel.shmmax = 536870912
kernel.shmmni = 4096
kernel.sem = 250 32000 100 128
net.ipv4.ip_local_port_range = 9000 65500
net.core.rmem_default = 262144
net.core.rmem_max = 4194304
net.core.wmem_default = 262144
net.core.wmem_max = 1048586
The current values can be tested using the following command.
/sbin/sysctl -a | grep <param-name>
Run the following command to change the current kernel parameters.
/sbin/sysctl -p
Add the following lines to the "/etc/security/limits.conf" file.
oracle soft nproc 2047
oracle hard nproc 16384
oracle soft nofile 4096
oracle hard nofile 65536
oracle soft stack 10240
Create the new groups and users.
groupadd oinstall
groupadd dba
groupadd oper
groupadd asmadmin
useradd -g oinstall -G dba,oper,asmadmin oracle
passwd oracle
Set secure Linux to permissive by editing the "/etc/selinux/config" file, making sure the SELINUX flag is set as follows.
SELINUX=permissive
Create the directories in which the Oracle software will be installed.
mkdir -p /u01/app/oracle/product/11.2.0/db_1
chown -R oracle:oinstall /u01
chmod -R 775 /u01
Login as root and issue the following command.
xhost +<machine-name>
Login as the oracle user and add the following lines at the end of the ".bash_profile" file, remembering to adjust them for your specific installation.
# Oracle Settings
TMP=/tmp; export TMP
TMPDIR=$TMP; export TMPDIR
ORACLE_HOSTNAME=ol5-112.localdomain; export ORACLE_HOSTNAME
ORACLE_UNQNAME=DB11G; export ORACLE_UNQNAME
ORACLE_BASE=/u01/app/oracle; export ORACLE_BASE
ORACLE_HOME=$ORACLE_BASE/product/11.2.0/db_1; export ORACLE_HOME
ORACLE_SID=DB11G; export ORACLE_SID
PATH=/usr/sbin:$PATH; export PATH
PATH=$ORACLE_HOME/bin:$PATH; export PATH
LD_LIBRARY_PATH=$ORACLE_HOME/lib:/lib:/usr/lib; export LD_LIBRARY_PATH
CLASSPATH=$ORACLE_HOME/jlib:$ORACLE_HOME/rdbms/jlib; export CLASSPATH
Installation
Log into the oracle user. If you are using X emulation then set the DISPLAY environmental variable.
DISPLAY=<machine-name>:0.0; export DISPLAY
Start the Oracle Universal Installer (OUI) by issuing the following command in the database directory.
./runInstaller
The GUI window will open and proceed with the installation:
Configure Security Updates:

Select Installation Option


Select Install Type

Typical Installation Configuration

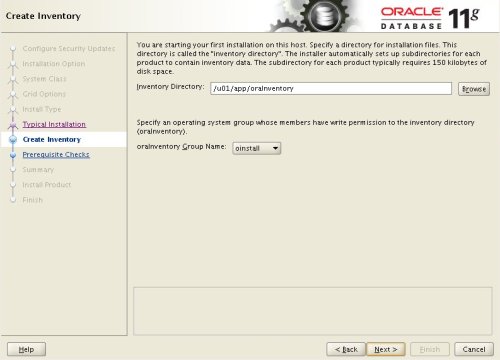
Create Inventory
Perform Pre-requisition check

Summary

Install Product


Execute Configuration Script

Finish

Post Installation
Edit the "/etc/oratab" file setting the restart flag for each instance to 'Y'.
DB11G:/u01/app/oracle/product/11.2.0/db_1:Y
Hope this helps. If i miss any steps please let me know -- Phil